Catch Basin Installation System and Method
How to Install a Catch Basin
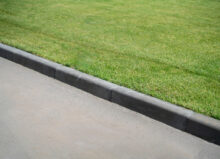
Catch basins are an unassuming part of many landscapes, quietly doing their jobs to help prevent flooding and damage to the grounds. Also known as storm drain or curb inlets, catch basins are strategically placed to capture excess water and move it into a wastewater system or other underground system. Installing a catch basin is a great idea for areas with lots of rain, runoff or flash flooding, as it can protect valuable landscape features from ending up under water. Here’s a quick look at how to install a catch basin.
Pick the Location
If possible, it’s helpful to wait until a heavy rain to observe where water and debris tend to flow and gather. If it’s already clear where the drain needs to be, start by planning the material and height that will be needed for optimal water manipulation and capture. Having a slight slope toward that area will be ideal for directing water there. Consider the best materials to use for the job and purchase the supplies.
Create the Trenches
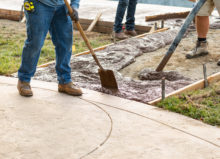
It’s time to get out the shovel and start digging. However, it seems to be a bigger job, heavy equipment might be a better bet. Catch basin installation isn’t difficult, but there can be a lot of manual labor involved. The trenches should be wide enough to contain the pipes with about 3 inches of clearance on either side. The hole for the basin itself must be significantly larger and line up with the trench.
Putting It Together
Now it’s time to lay the pipes in the trench. Before putting the basin permanently in place, use an adapter to connect it securely to the pipe system. Concrete or gravel may be used to secure the basin in place. Concrete is more long-lasting and gravel is easier to install. A layer of gravel should be placed under the basin. After the basin is in place, secure the grate to the top.
Connect the pipes to the basin on both the inlet and outlet sections. Depending what type of piping is used, the methods of securement will be different. Use tape or glue on the joints as necessary.
Testing and Back-fill
Using a hose, test out the system. Look for leaks or problem areas that should be fixed before the back-filling process. Make sure the flow into the catch basin is smooth. Finally, back-fill the trenches and holes with gravel. It is important during this step to compact the gravel several times to remove any voids; as gravel shifts, it could cause the system to sink, break or leak.
Why It Matters
Installing a catch basin in the optimal location can increase the longevity of a landscape. Because landscaping can be a major investment, adding simple solutions such as catch basins makes a lot of sense without requiring a great deal of work. In addition, it serves as a primary filtering site that helps keep debris out of the storm drain or sewer system, which benefits everyone who uses the system. We hope this guide helped you with the process of how to install a catch basin.
If you need more help on how to install a catch basin, contact us today!